
OpenStack with vSphere and NSX - Part 2: Create and configure the VMware NSX cluster
Notice: This article is more than 10 years old. It might be outdated.
Welcome to part 2 of the series on installing OpenStack with VMware vSphere and VMware NSX. This series shows the deployment of a OpenStack cloud that leverages VMware vSphere – along with it’s well-known enterprise-class benefits such as VMotion – as the underlying Hypervisor. In addition, network virtualization within OpenStack will be provided via NSX as a Neutron plugin. This allows the creation of virtual networks within OpenStack that consist of L2 segments and can be interconnected via L3 to each other or the outside world.
In Part 1: “OpenStack with vSphere and NSX – Part 1: Install and configure the VMware NSX appliances” we finished the installation and basic configuration of the VMware NSX appliances. In this post you will learn how to use the NSX Manager’s web-based GUI to join these parts together and build the basic functionality of an NSX installation consisting of a NSX Cluster, NSX Gateway and NSX Service Node as transport nodes as well as a Transport Zone and a Gateway Service.
Connect the NSX Manager to the NSX Cluster
Let’s start by making the NSX Manager aware of the NSX Cluster to be used. This will allow us in subsequent steps to manage this NSX cluster and add further components.
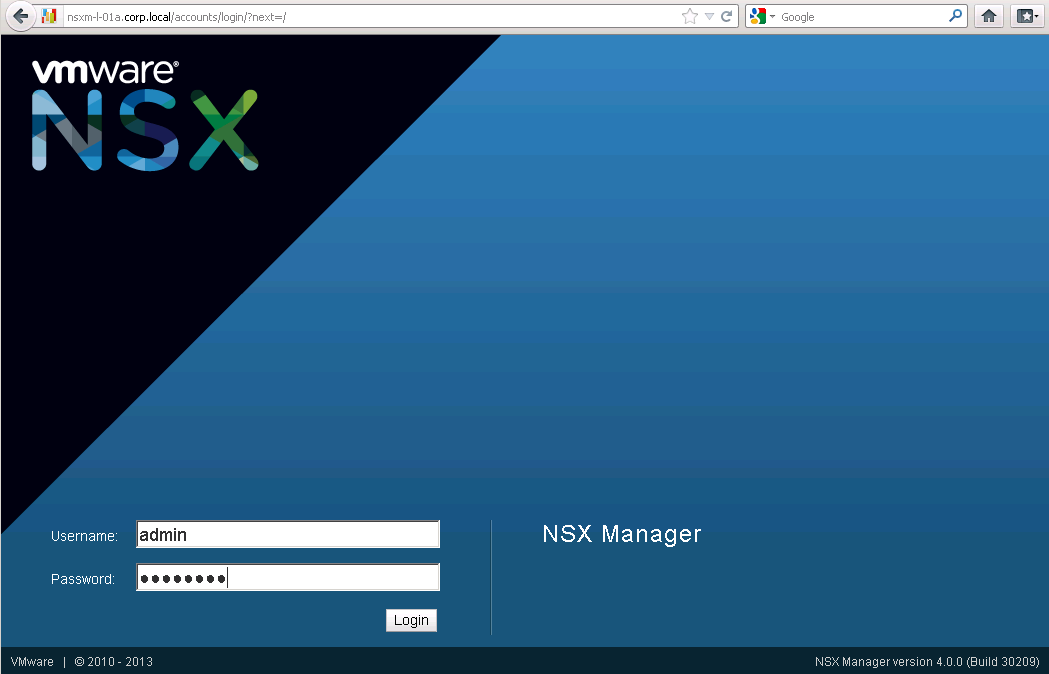
First login to the NSX Manager with the credentials that were set in the previous post (See Figure 1). By default this would be the username “admin” along with the password “admin”.
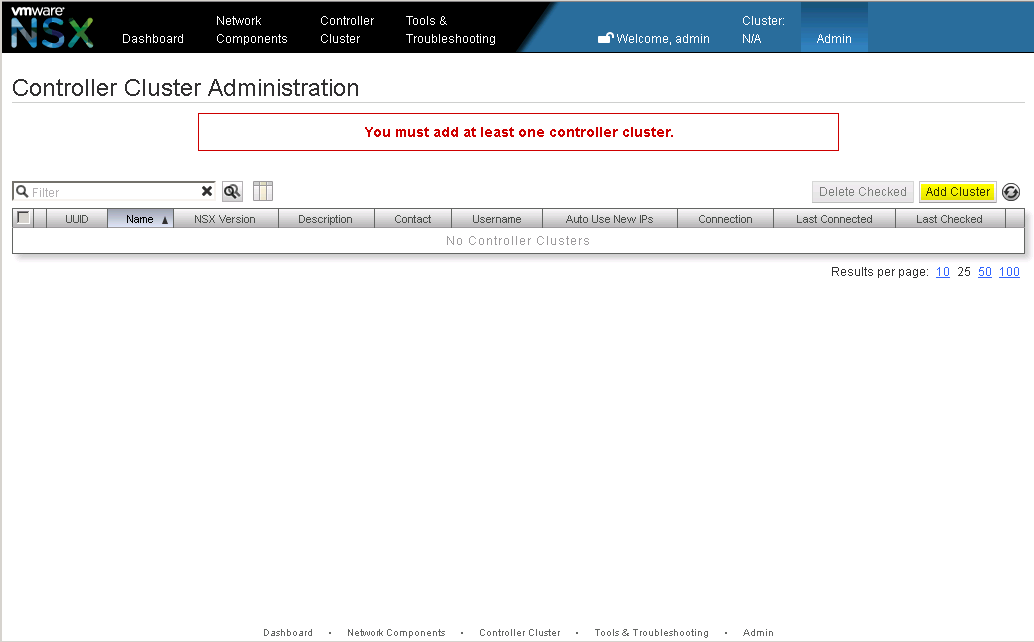
After the initial login, NSX Manager will indicate that it is currently not connected to any cluster and therefore not much of any use (See Figure 2). Click on Add Cluster to add the first NSX cluster to the NSX Manager.
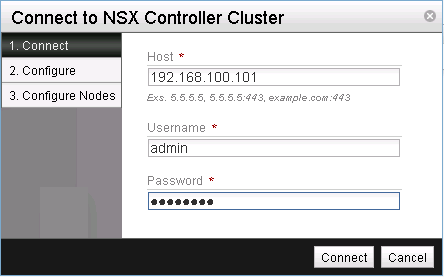
Provide the IP address along with the access credentials of any node within the NSX cluster (See Figure 3). Remember that in this case we have only a single NSX controller available.
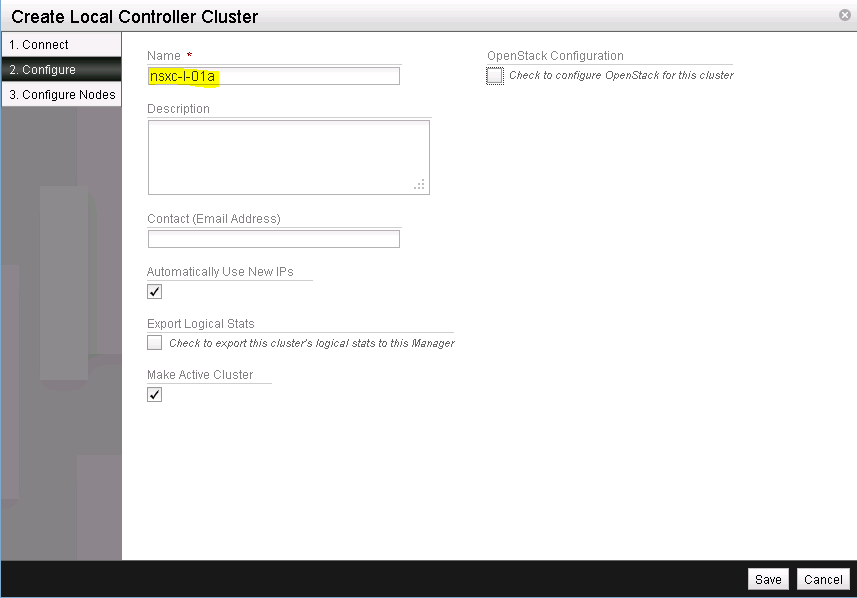
Next, provide a name for this NSX cluster (See Figure 4).
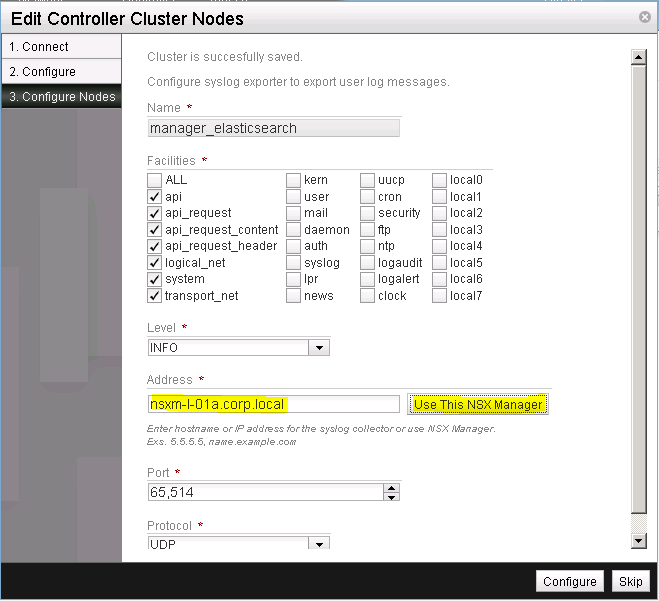
Click on Use This NSX Manager, to specify the NSX Manager as the syslog collector of this NSX cluster. Leave all other settings as is (See Figure 5). In a production environment you would obviously adapt these settings, but for this setup these settings are just fine.
Complete your selection by clicking on Configure.
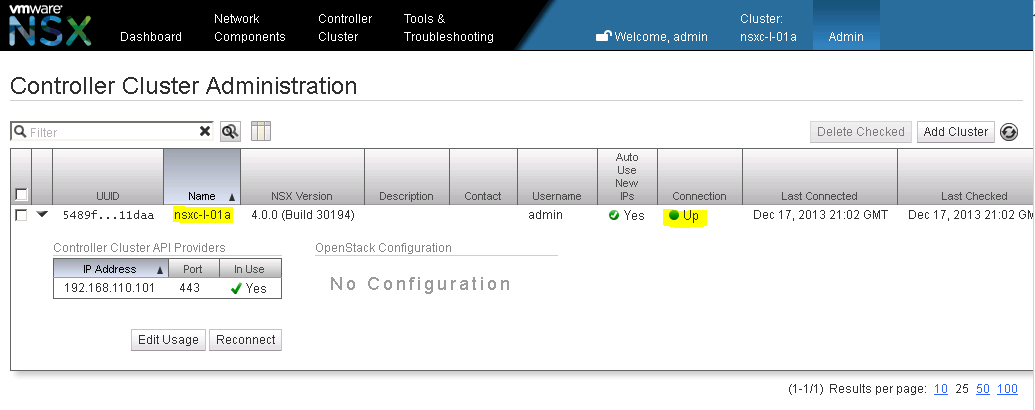
You should see the NSX controller cluster successfully added with the Connection status as “Up” (See Figure 6).
Going to the NSX Manager Dashboard will show you the NSX Controller without any transport nodes added (See Figure 7).
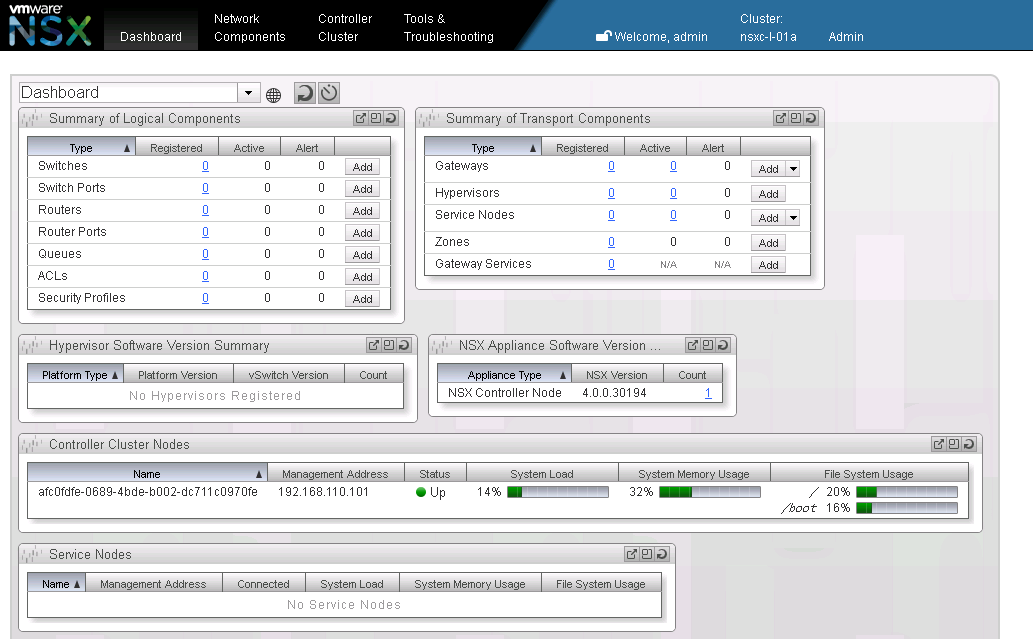
Keep in mind that a single NSX Manager can manage multiple NSX controller cluster.
Add a new Transport Zone
In VMware NSX a transport zone corresponds to the underlying physical network used to interconnect transport nodes (hypervisors, service nodes, gateways). A simple VMware NSX deployment will have a single transport zone that represents the physical network connectivity within the data center. But more complex topologies with multiple networks within and outside the data center are possible via multiple transport zones. Here we will use a single transport zone as all transport nodes connect to the same underlying network.
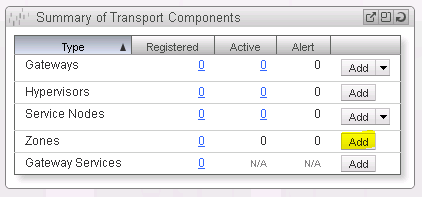
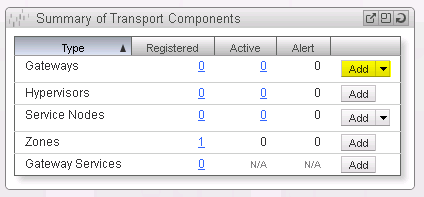
On the NSX Manager Dashboard, within the Summary of Transport Components section, click on Add within the Zones row (See Figure 8).
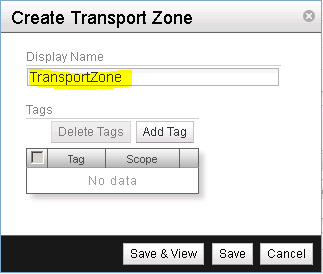
Give the new transport zone a name (See Figure 9). Click on Save & View to finish the creation of a new transport zone.
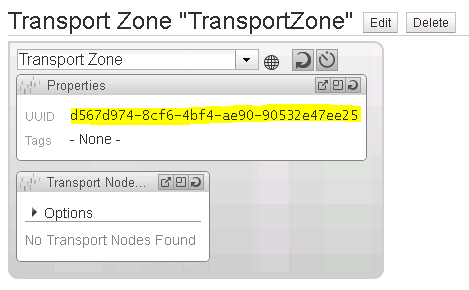
Note down the UUID of the newly created transport zone (See Figure 10). We will need this UUID in a later step to configure the vSphere OpenStack Virtual Appliance (VOVA).
Add a new Gateway node
An NSX Gateway connects logical networks to the data center’s physical network or to physical applications. While the NSX gateway appliance was installed and configured in a previous step, it now needs to be added to the NSX cluster.
Return to the NSX Manager Dashboard, within the Summary of Transport Components section, click on Add within the Gateways row (See Figure 11).
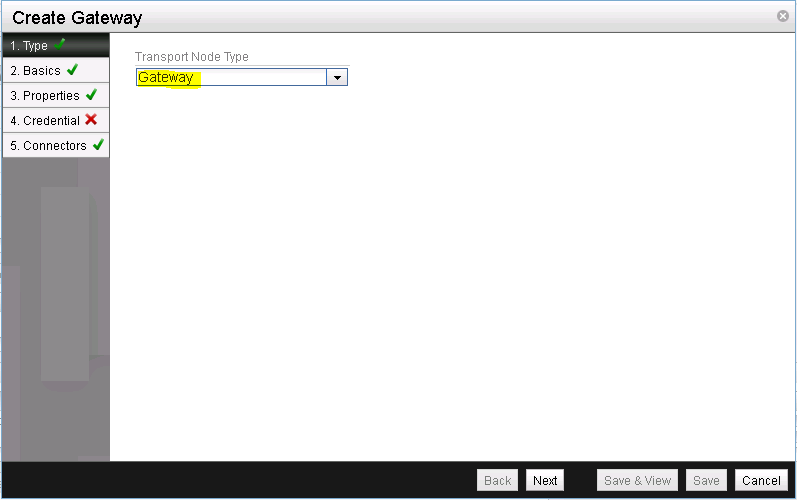
Confirm that the pre-selected transport type is Gateway (See Figure 12).
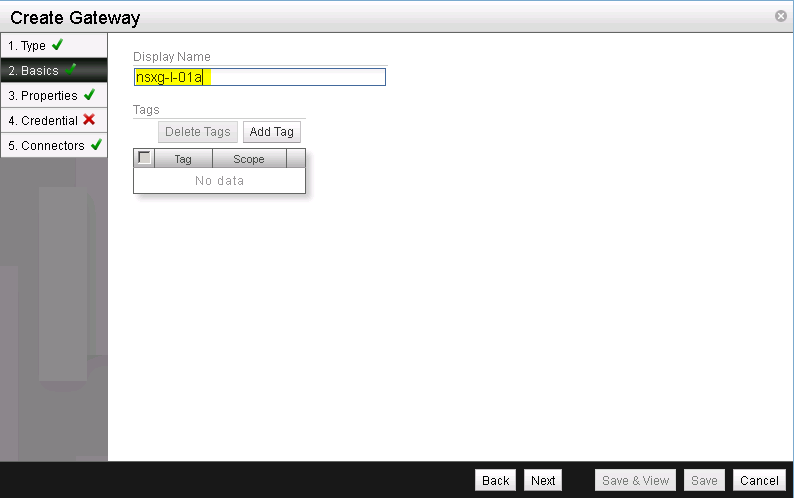
Give the gateway node a name (See Figure 13). I usually pick the hostname.
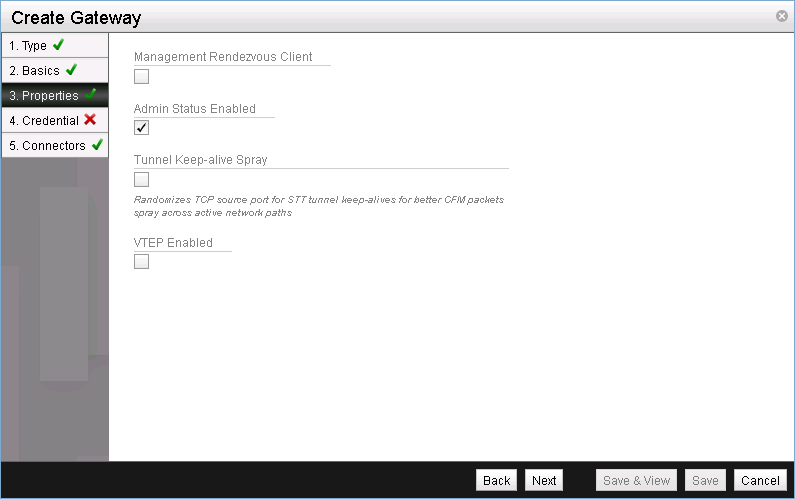
Here leave the settings as is (See Figure 14). A Management Rendezvous Client would be necessary if NSX Controller and NSX Gateway do not have direct network connectivity, the Tunnel Keep-alive Spray would randomize TCP source ports for STT tunnel keep-alives for packet spray across active network path and VTEP enabled would be for physical NSX gateways as e.g. offered by Arista EOS. As none of this applies here, we will stick to the default settings.
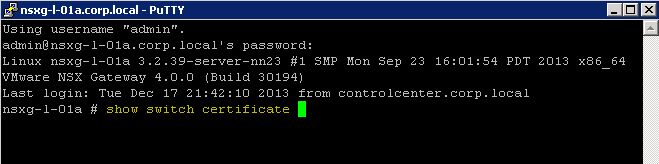
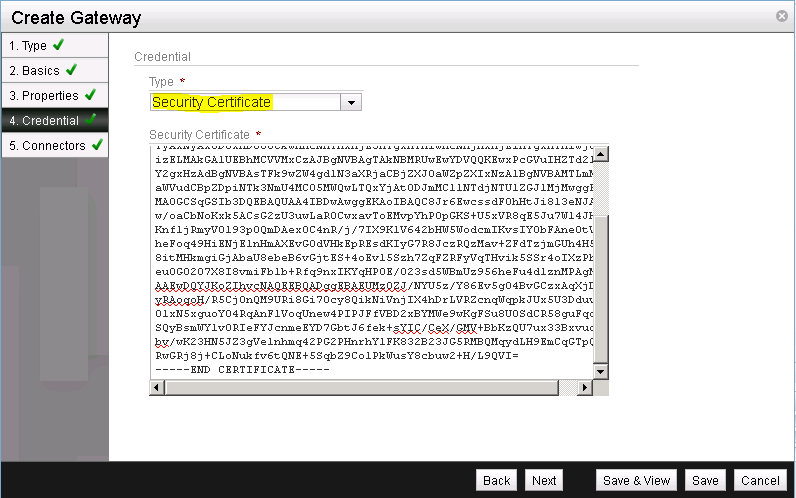
Before we can complete the next step, we need to extract the SSL certificate from the NSX gateway appliance. To do so, connect via SSH or console to the NSX gateway appliance and login with the previously defined password and the username admin. Use the command show switch certificate to display the required certificate (See Figure 15).
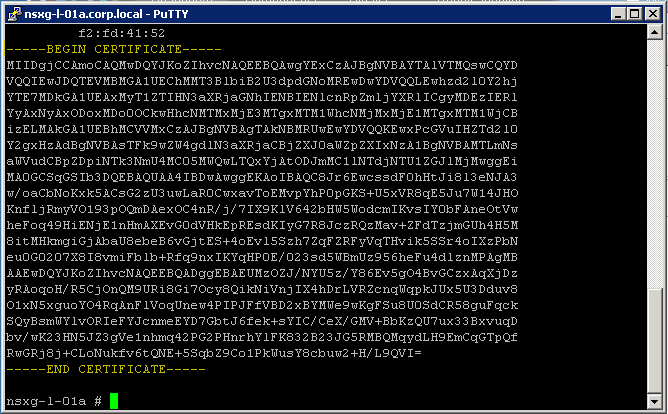
Copy the certificate including the lines ----BEGIN CERTIFICATE---- and ----END CERTIFICATE---- (See Figure 16). We will need this certificate in the next step.
Back in the NSX Manager select the Credential Type of Security Certificate and paste the previously copied certificate into the Security Certificate field (See Figure 17).
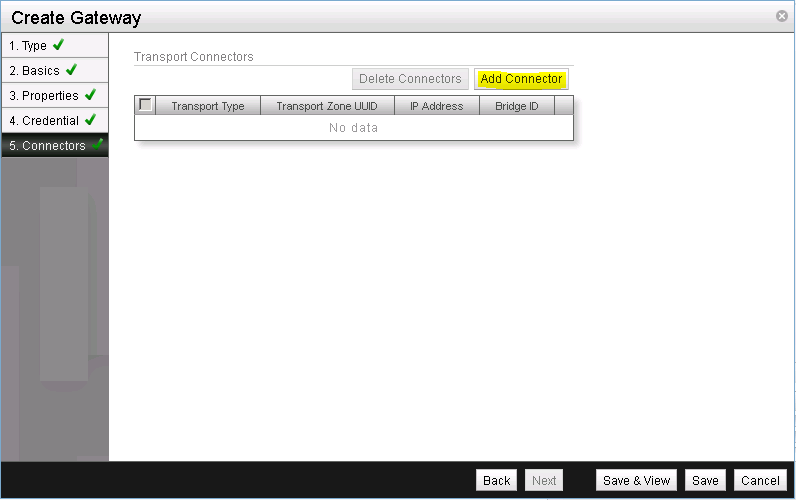
Next, we need to create a transport connector for the NSX Gateway. A transport connector does two things:
- It specifies the transport type or tunnel protocol to be used by the transport node. This transport type has to match for nodes to be able to form an overlay tunnel and communicate.
- It maps the (physical) interface of a transport node to a transport zone. With this it would be possible to use a single transport node (e.g. gateway) in multiple transport zones.
We will use STT as the transport type in this setup. And remember that we are only using a single transport zone.
Let’s get started by clicking on Add Connector (See Figure 18).
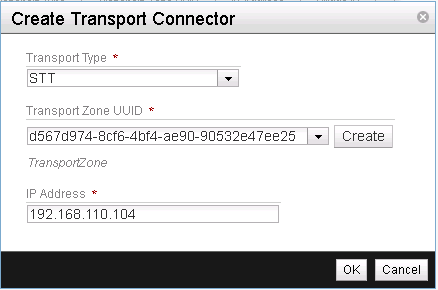
Select STT as the Transport Type, ensure that the Transport Zone UUID matches our single transport zone and enter the IP address of the NSX gateway as the IP address (See Figure 19).
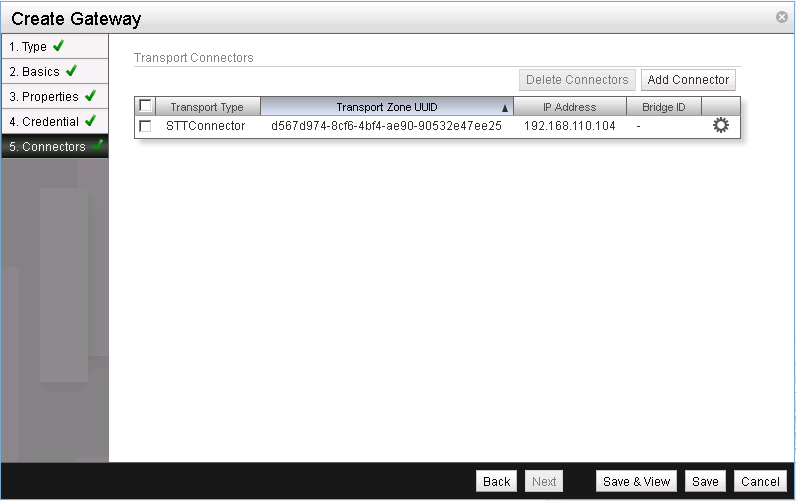
This concludes the setup of the NSX Gateway in NSX Manager. Click on Save to finish the configuration (See Figure 20).
Return to the NSX Manager Dashboard, where you will see the new Gateway within the Summary of Transport Components section, within the Gateways row. Click on the number for active gateways to see more details (See Figure 21).
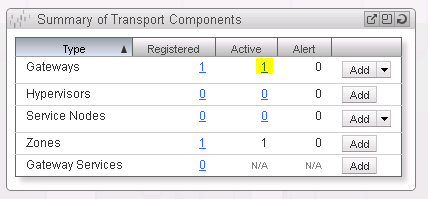
You should see the NSX gateway successfully added with the Connection status as Up (See Figure 22).

Add a new Service node
NSX Service Nodes offload network packet processing from hypervisor Open vSwitches, such as broadcast, unknown unicast and multicast (BUM) replication and CPU-intensive cryptographic processing. While the NSX service node appliance was installed and configured in a previous step, it now needs to be added to the NSX cluster.
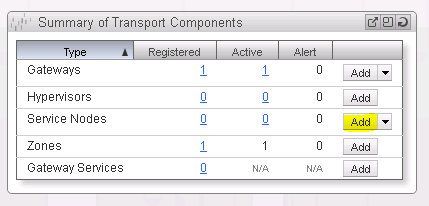
Return to the NSX Manager Dashboard, within the Summary of Transport Components section, click on Add within the Service Nodes row (See Figure 23).
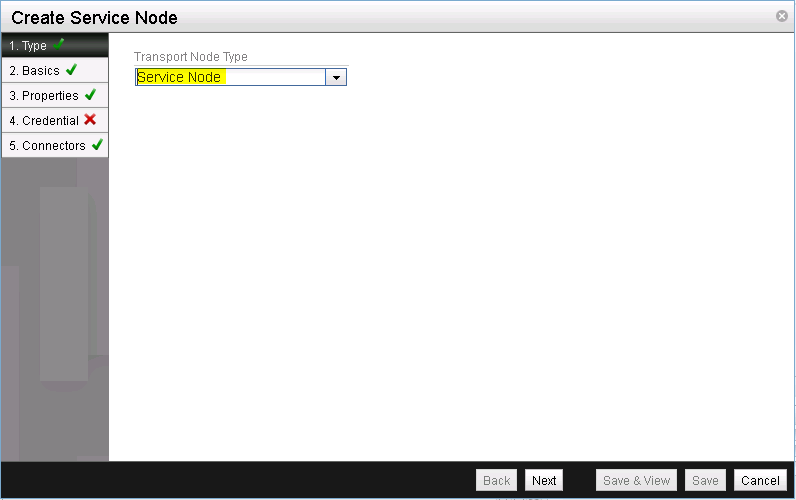
Confirm that the pre-selected transport type is Service Node (See Figure 24).
The rest of the dialog and workflow for adding the service node is equivalent to what we have already seen while adding the gateway node:
- Specify the Display Name
- Extract the SSL certificate from the NSX service node appliance
- Paste the SSL certificate into the add dialog
- Specify a transport connector with the type STT and the IP address of the service node
We will therefore skip ahead to the result.
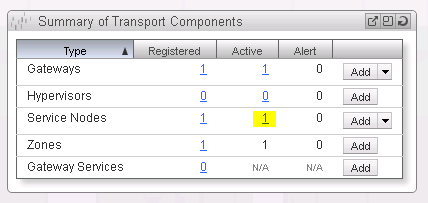
Return to the NSX Manager Dashboard, where you will see the new service node within the Summary of Transport Components section, under the Service Nodes row (See Figure 25).
Add a new Gateway Service
A Gateway node by itself does not yet offer any functionality. For that we need to configure a gateway service that will leverage the gateway node. Two types of gateway services exist in VMware NSX:
- Layer 2 (L2) Gateway Services - allows VMs to be connected at Layer 2 (L2) to an external network
- Layer 3 (L3) Gateway Services - lets you connect logical router ports to physical IP networks via network interfaces on NSX Gateway nodes
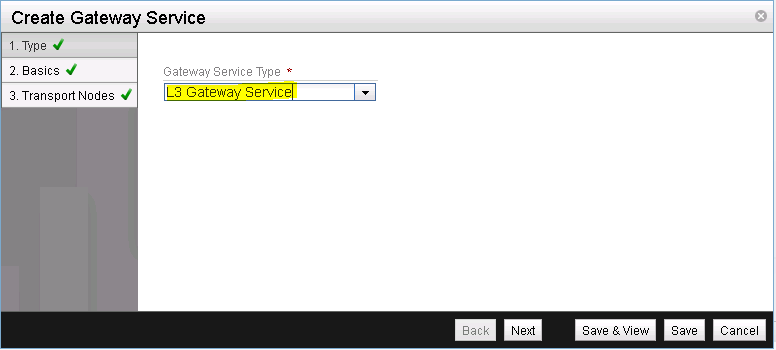
We will configure a L3 Gateway Service.
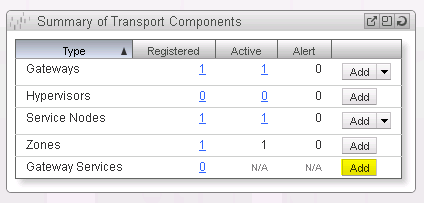
Return to the NSX Manager Dashboard, within the Summary of Transport Components section, click on Add within the Gateway Services row (See Figure 26).
Select L3 Gateway Service as the Gateway Service Type (See Figure 27).
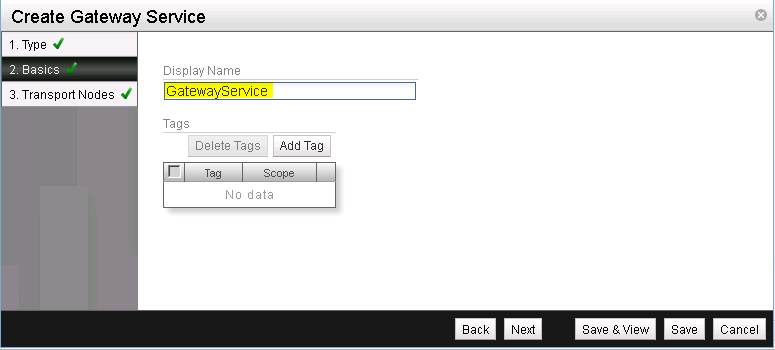
Enter a name for the newly created gateway service (See Figure 28).
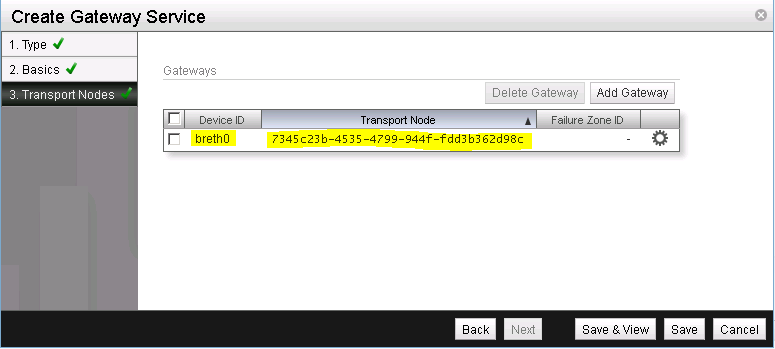
Now we need to specify the gateway node that will execute this gateway service. Start by clicking on Add Gateway (See Figure 29).
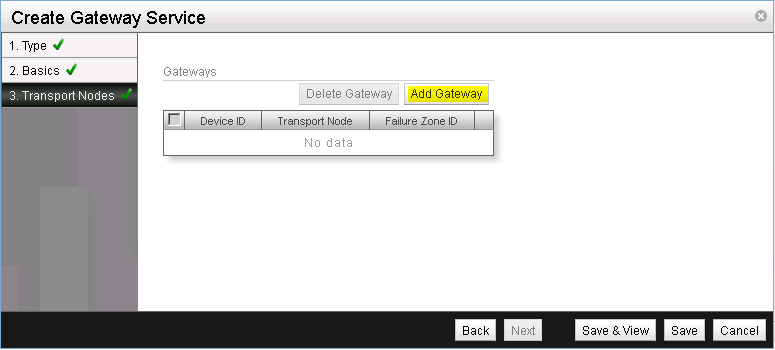
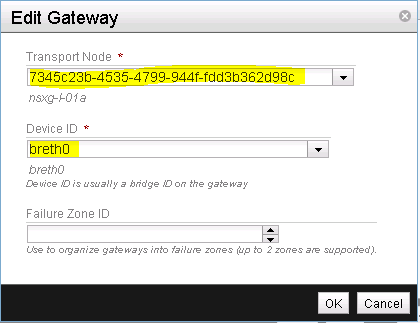
Select the gateway node that was previously created as well as breth0 for the Device ID. The device ID is the interface on the NSX gateway node that connects to the external (upstream) network (See Figure 30).
Verify your Gateway node configuration and finish the installation of the gateway service by clicking on Save & View (See Figure 31).
Note down the UUID of the newly created gateway zone (See Figure 32). We will need this UUID along with the UUID of the transport zone in a later step to configure the vSphere OpenStack Virtual Appliance (VOVA).
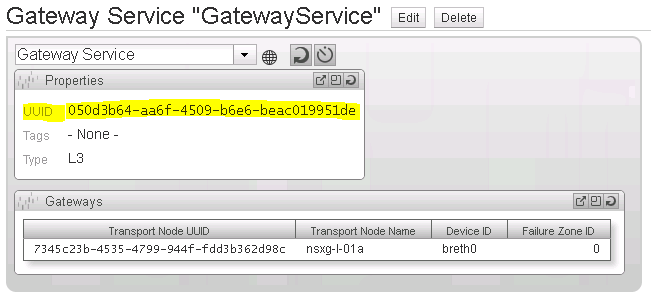
Return to the NSX Manager Dashboard, where you will see the new Gateway Zone within the Summary of Transport Components section, within the Gateway Zones row (See Figure 33).

This completes the basic configuration of the NSX cluster via the NSX Manager. Next in the series on OpenStack with vSphere and NSX is Part 3 with the installation and configuration of the Open vSwitch inside the ESXi hosts. While we finished adding the NSX gateway and NSX service node to the NSX cluster in this post, the next post will show how to add the two ESX hypervisor to the NSX cluster. This is done by installation and configuration of the Open vSwitch inside ESX.
Leave a comment