
Jumbo Frames with VMware ESXi
Notice: This article is more than 10 years old. It might be outdated.
Ethernet’s default maximum size for data transmission is 1500 bytes due to legacy compatibility reasons. Unfortunately with newer high-speed networks - such as 10 Gigabit Ethernet (10 GigE) - breaking up data into chunks of 1500 bytes - also called frames - creates a lot of overhead with a high header to payload ratio. This not only creates a higher than necessary overhead on the Hypervisor’s CPU, but also prevents one from utilizing the full capabilities of the network hardware. For example: On a 10Gbit link it is possible that you will only be able to transmit about 3-4 Gbps of data between machines using 1500 byte frames, while you can easily saturate 10Gbit when using jumbo frames.
Background
Modern full-featured network equipment can transmit larger frame sizes if configured to do so, usually up to a value of at least 9000 bytes. Even though almost every vendor of network equipment has a different maximum value of what their products can be configured with for MTU, it is recommended to stick to a MTU of 9000 bytes for Jumbo Frames. This value is easy to remember and all network products that support Jumbo frames usually support at least this value.
Jumbo frames should only used in a controlled and segmented environment, for example within an iSCSI or NFS SAN, as they can cause additional overhead from the need for packet fragmentation at the point when converting between a 9000 byte frame network and a standard 1500 byte frame network.
Goal
One of the main use case for Jumbo Frames within VMware vSphere is between an ESXi host and an iSCSI or NFS storage array. Another common use case is between ESXi hosts for VMotion traffic. While this post focuses on the former use case, it is easily transferable to the later.
VMware ESXi uses so-called VMkernel ports to connect the Hypervisor to a storage array. You can think of this port as the Hypervisor kernel’s equivalent to a vNIC for Virtual Machines. In order to use Jumbo Frames between the Hypervisor and the storage array, all elements in between need to be configured for at least the desired MTU size - here 9000. (See Figure 1).

This includes the physical storage array, the physical switch, potentially the physical server (e.g. for the Cisco UCS, where this server includes networking capabilities), the VMware Virtual Switch (both default vSwitch and Distributed vSwitch) and last but not least the VMkernel port itself.
It is important to note that the network elements only need to be configured for at least the desired MTU size. If the MTU size ends up being higher, it will not impact functionality. As an example: The Arista Networks switches have a default MTU size of 9216 bytes, which can remain as is. No need to make any changes here.
I’ll leave the exercise of figuring out how to configure your physical equipment to a MTU size of 9000 to you. Unfortunately almost every vendor has a different approach for achieving this.
Configuring ESXi
Support for jumbo frames has been included in ESX and ESXi for quite a while. But up until version 5.0 of vSphere is was not exposed in the GUI for both the default vSwitch and Distributed vSwitch implementation. It had to be configured via the ESX CLI for a default vSwitch and VMkernel port. Since vSphere 5.1 it is possible to configure the MTU settings via the GUI for all three elements.
Keeping in mind Figure, we will need to change the MTU settings both for the virtual Switch (irrespective of whether this is a default vSwitch or a Distributed vSwitch) and the VMKernel port.
Default vSwitch
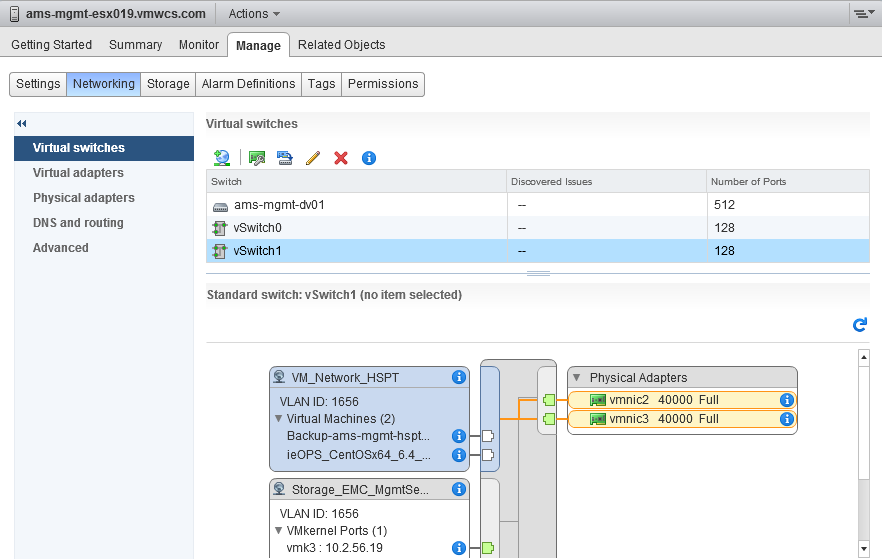
For the Default vSwitch navigate to host to which this vSwitch belongs to and choose Manage -> Networking -> Virtual Switches -> Name of Virtual Switch -> Edit. (See Figure 2).
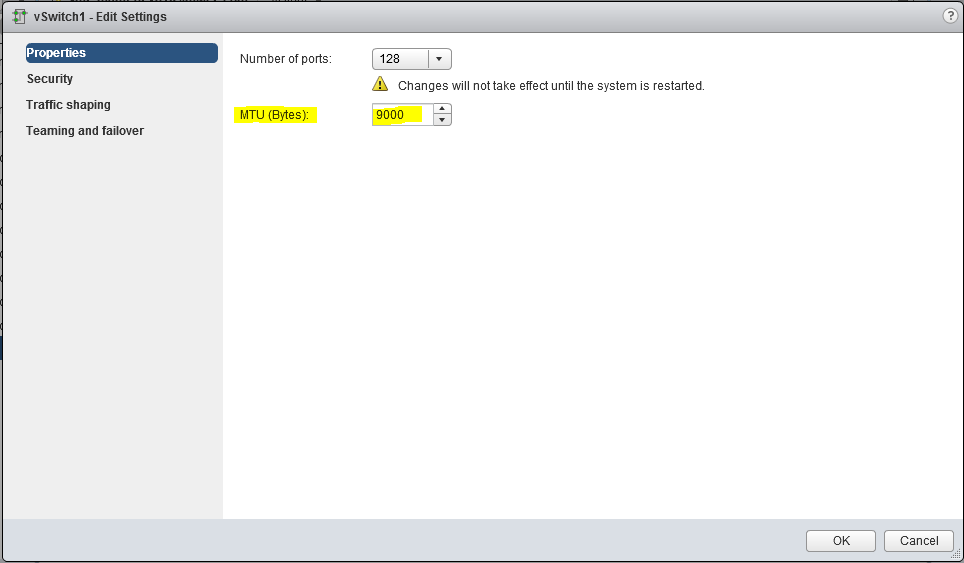
Next change the MTU (Bytes) setting to 9000 under Properties and confirm your choice with a click on OK. (See Figure 3)
You will have to repeat these steps for all Default vSwitches on all your hosts that you want to leverage Jumbo Frames on.
Distributed vSwitch
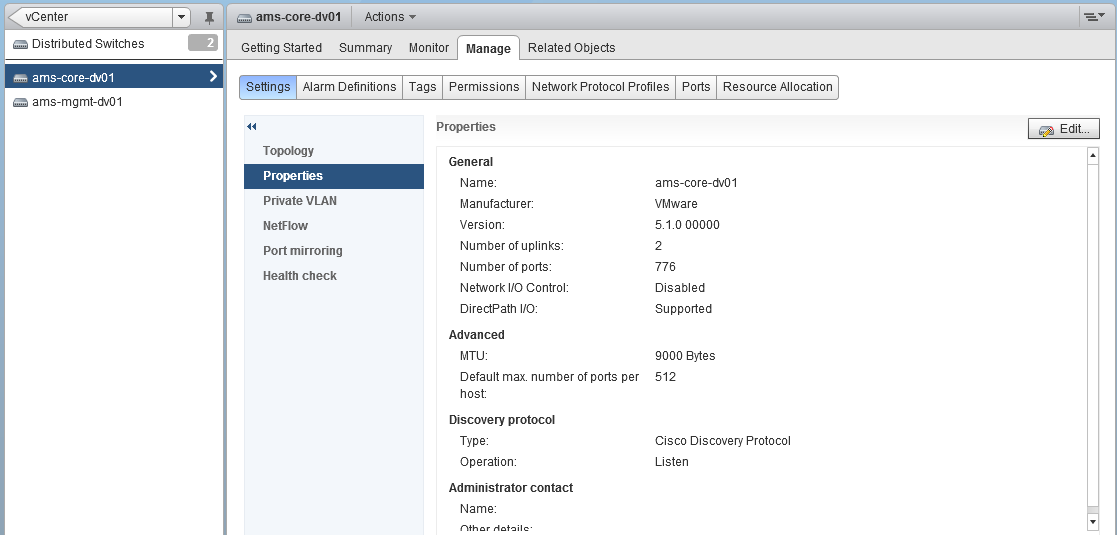
To change the MTU settings of a Distributed vSwitch navigate to the desired vDS. Next choose Manage -> Settings -> Properties -> Edit. (See Figure 4).
Under the NIC settings tab change the value for MTU to 9000. (See Figure 5).
VMKernel ports
Next change the MTU setting of the VMKernel that you want to use with Jumbo Frames. This could e.g. be the VMkernel port used for iSCSI or NFS storage, or the VMKernel port used for VMotion.
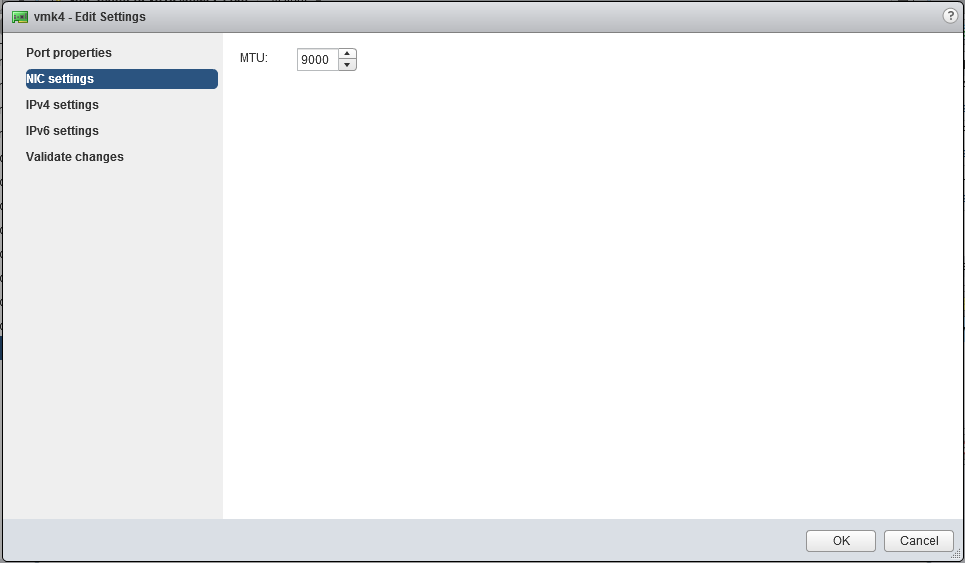
Select the ESXi host that hosts the desired VMkernel port and navigate to Manage -> Networking -> Virtual adapters -> Desired VMKernel Device -> Edit. (See Figure 6).
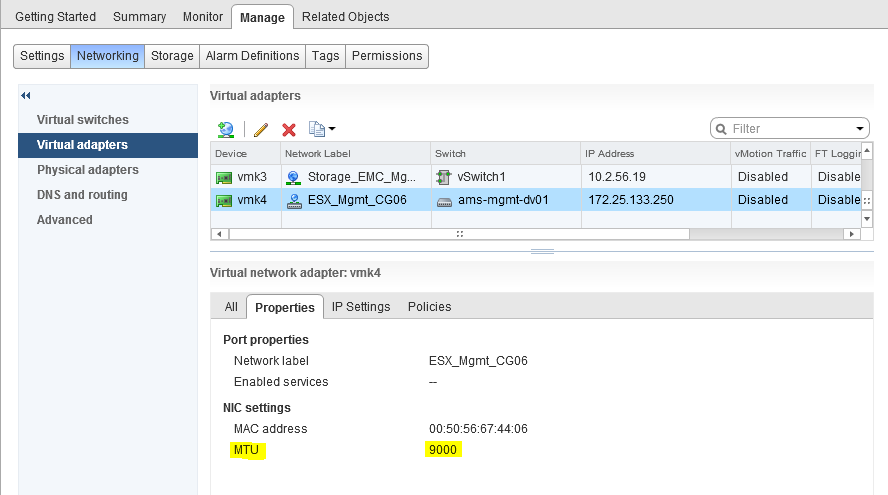
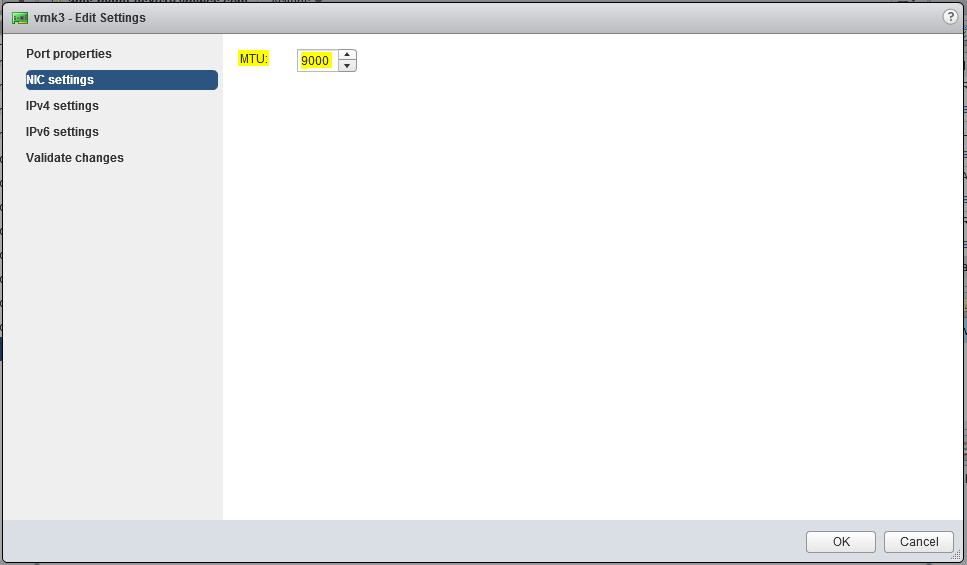
Under the NIC settings tab, change the MTU value to be 9000. (See Figure 7).
You will have to repeat these steps for all VMkernel ports on all your hosts that you want to leverage Jumbo Frames on.
Testing functionality
With all the configuration changes needed at so many different places, it is easy to miss a spot or two. Therefore it is highly recommend to test your settings, before declaring victory.
For this purpose we will use the ESXi tool vmkping to send test traffic from an ESXi host to the storage array or another ESXi host - depending on your use case.
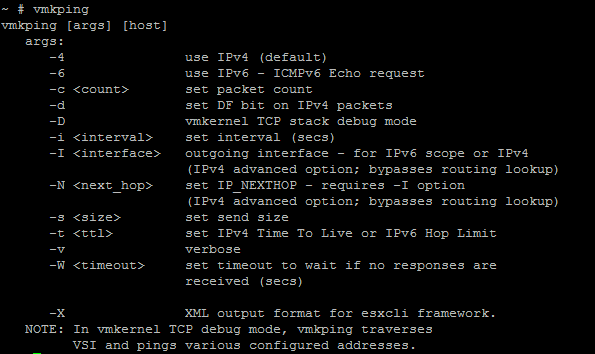
Looking at the options of the vmkping tool, we see two options that are important for this test. (See Figure 8).
One is the ability to set the so-called DF bit or “Do not fragment” with the -d switch. The other is the ability to specify the desired payload size for the ping packet with the -s switch.
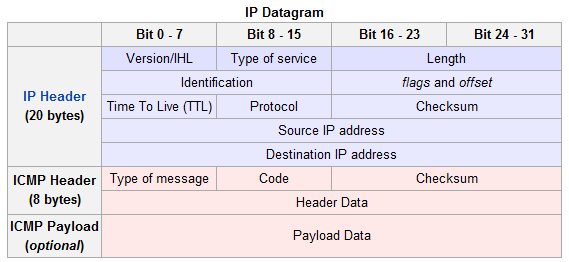
Unfortunately the build-in documentation for this tool isn’t very good, as it doesn’t tell you that the -s switch specifies the payload size of the ICMP packet. You therefore need to add 8 bytes of ICMP headers and 20 bytes of IP headers before you end up with the frame size that will actually hit the wire. (See Figure 9).
Also the “Do not fragment” will instruct the network layer of the ESXi host as well as all other network elements not to fragment - therefore not to split up - the packet.
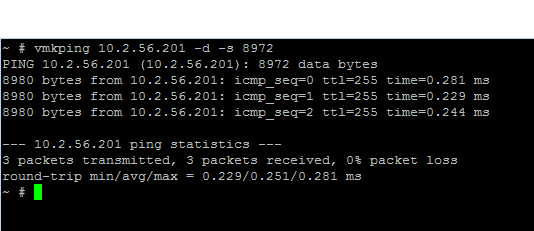
In order to assemble a test frame with the size of 9000 bytes, you only need to specify an ICMP payload of 8972 bytes.
If you configured your network correctly, using vmkping -d -s 8972 <IP of storage array> should therefore generate test traffic which is transported to the storage array and back. (See Figure 10).
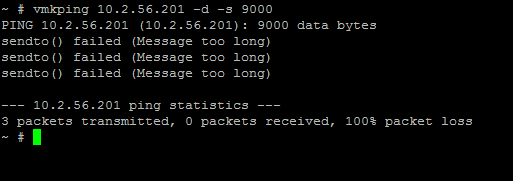
In case you forgot to configure one of the network elements or specified the wrong payload size, vmkping will indicate that it cannot send the desired test frame. (See Figure 11).
Configuring Jumbo Frames via CLI
In case you want to configure Jumbo Frames via the CLI for a Default vSwitch or a VMKernel ports, here is what you need to do:
Example for vSwitch
List available Default vSwitches:
esxcfg-vswitch --list
Change the MTU setting for vSwitch0:
esxcfg-vswitch --mtu 9000 vSwitch0
Example for VMkernel interface
List available VMKernel ports:
esxcfg-vmknic --list
Change the MTU settings for a VMKernel port:
esxcfg-vmknic --mtu 9000 "VMkernel Portgroup Name"
Jumbo Frames on guests (Virtual Machines)
The default emulated Intel E1000 network device presented to guests in VMware ESX does not support Jumbo Frames, one must install VMware Tools and enable a VMXNET3 or newer interface to take advantage of Jumbo Frames.
Leave a comment